
Best way to installing Odoo 17 in Windows 11/10 on 2024
Best way installation Odoo 17 in Windows enables customers to take use of this ERP system’s potent capabilities in a comfortable operating environment. You may guarantee a seamless setup by carefully following a set of procedures, which include installing Python and PostgreSQL, configuring PostgreSQL and pgAdmin, and installing Visual Studio Tools for C++. Following these preparations, it’s imperative to download Odoo 17 from GitHub and configure PyCharm for development. The Python interpreter needs to be configured carefully, and installation of all required packages needs to be done. Users may successfully finish the Odoo 17 installation process by carefully according to these instructions. This procedure guarantees that a wider range of consumers may efficiently use this all-inclusive ERP system in addition to increasing its accessibility.
Why is Windows Odoo?
Because of its efficiency and reliability, Linux is a popular choice for hosting Odoo, although many users prefer the familiarity of the Windows operating system. Businesses and developers may take advantage of Odoo’s features without requiring a Linux server infrastructure by installing Odoo on Windows. Because of its adaptability, Odoo may be used by a wider range of users, including those who work exclusively with Windows.
Staring to installing Odoo 17 :
Installing Odoo 17 on Windows is a straightforward process that allows users to leverage the powerful features of this ERP system within a familiar operating environment. To ensure a smooth installation, it is essential to follow a series of steps, starting with installing Python and PostgreSQL, configuring PostgreSQL and pgAdmin, and installing Visual Studio Tools for C++. After these prerequisites are set up, downloading Odoo 17 from GitHub and setting up PyCharm for development are crucial steps. Throughout the process, special attention must be given to configuring the Python interpreter and ensuring all necessary packages are installed. By meticulously following these steps, users can successfully complete the installation of Odoo 17, thus enabling businesses to benefit from a robust and customizable management tool. Installing Odoo 17 on Windows not only expands its accessibility but also ensures that a broader range of users can effectively utilize this comprehensive ERP solution.
Step 1: Install Python
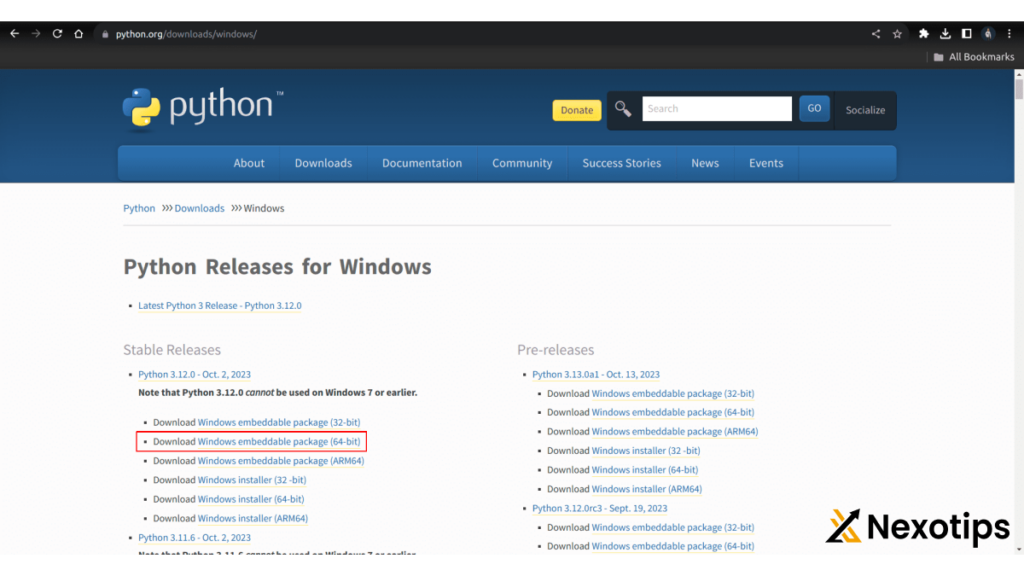
Before starting the installation, make sure Python is not already installed on your machine. On the command prompt, try running the “Python-version” command. Should Python be installed on your device, a version number such as “Python 3.xx.x” will be shown. An error message along the lines of “‘python’ is not recognized as an internal or external command, operable program, or batch file” may appear if you don’t follow these instructions. We require Python 3.10 or later for Odoo 17. Use the official website to get Python if your version is less than 3.10 or if your computer is not running Python: https://www.python.org/downloads/.
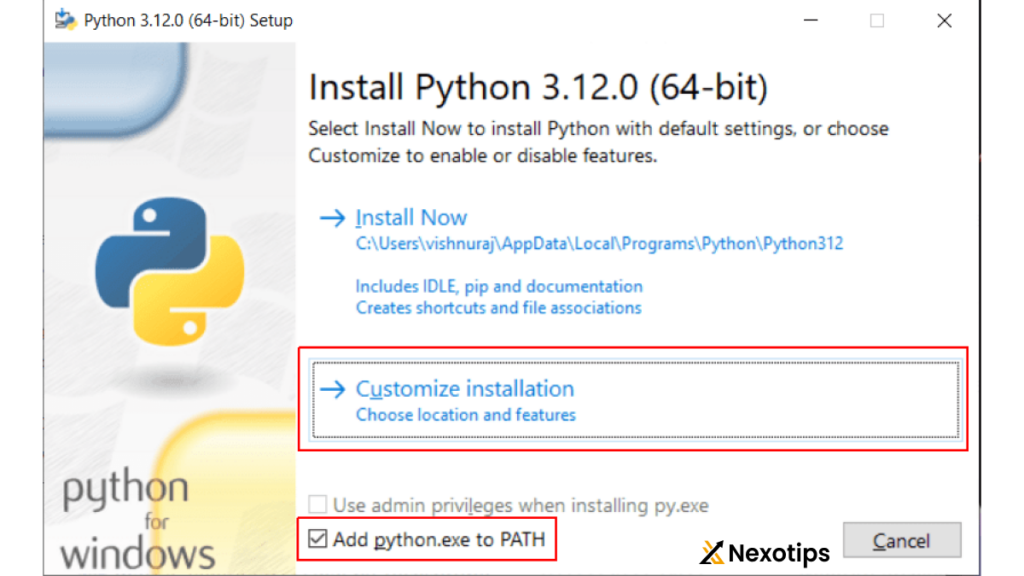
Select the “Custom Installation” option and select the “Add Python 3.12 to PATH” box when installing the downloaded.exe package.
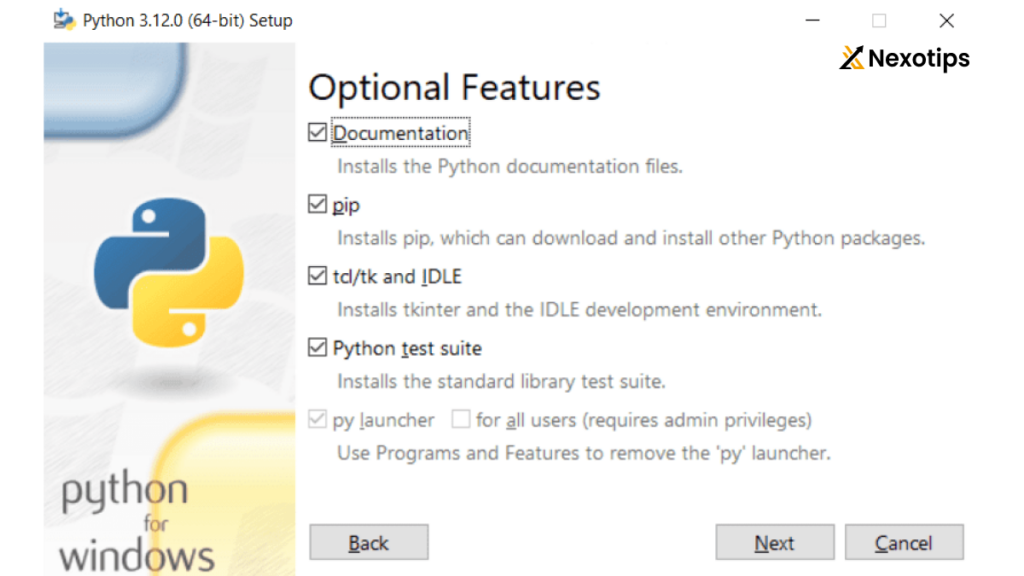
Click “Next” after selecting every checkbox on the optional page.
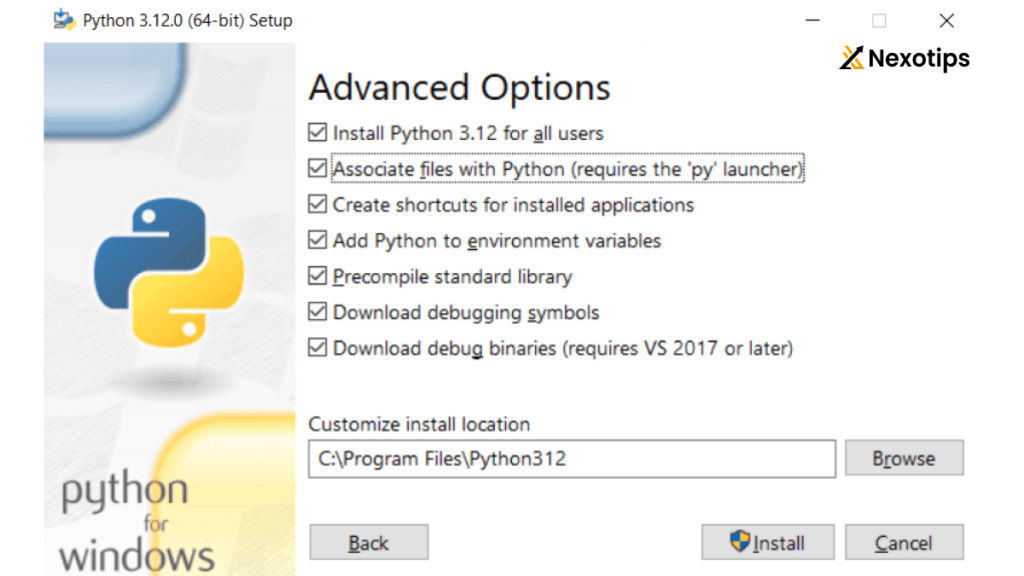
Select “Install” after checking the first five check boxes on the Advanced screen.
Step 2: Installing PostgreSQL
You may download and install PostgreSQL straight from its official website, [https://www.enterprisedb.com/downloads/postgres-postgresql-downloads], to have it installed on your computer.
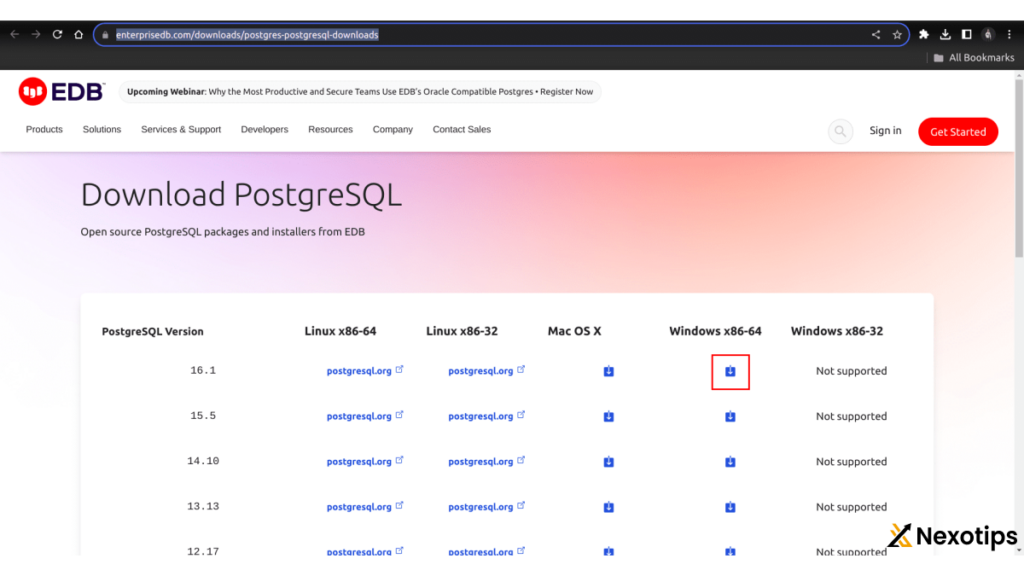
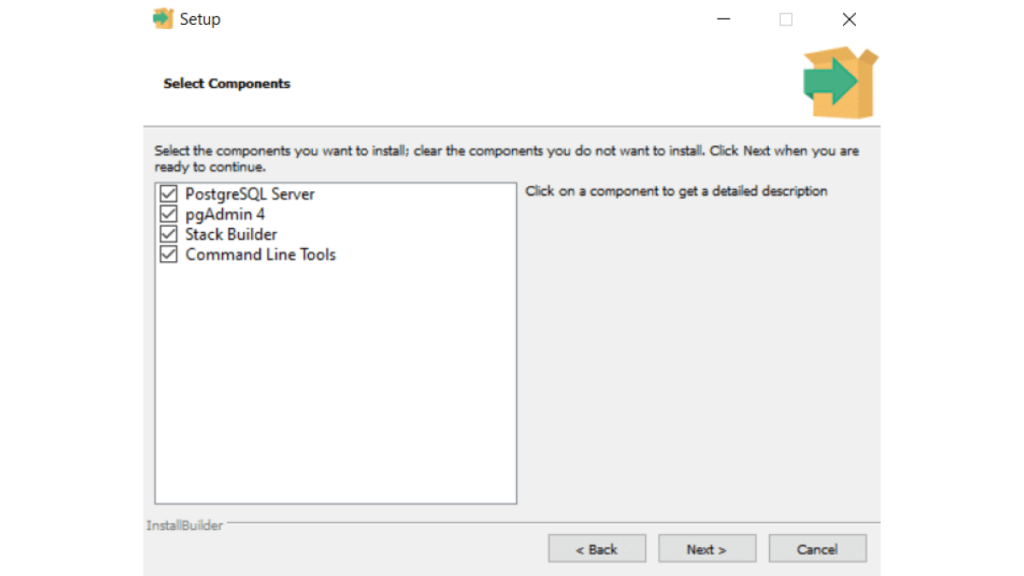
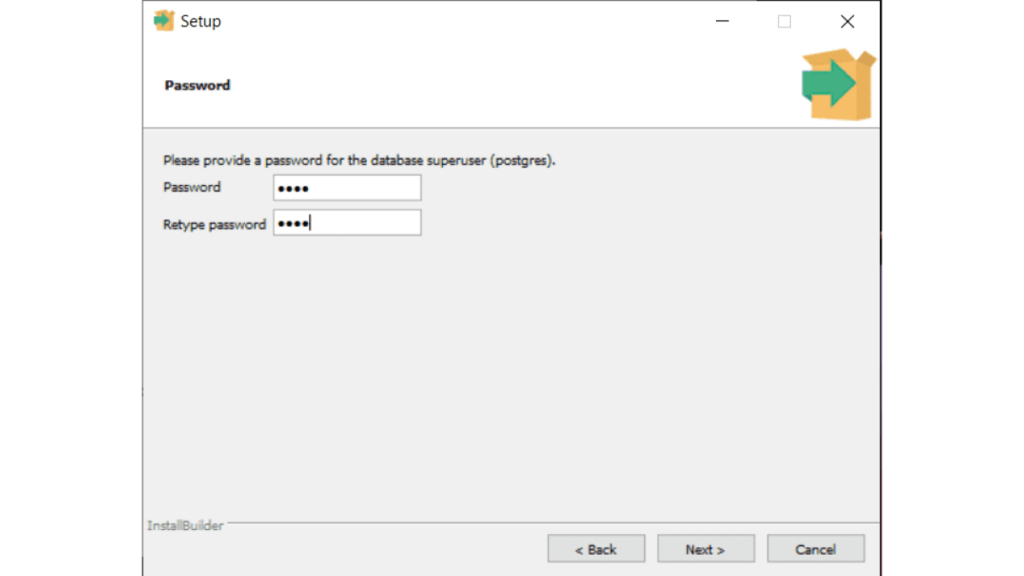
Select the “Windows x86-64” option and click the download button. Version 13 or later is preferred. Install the package after that. When installing, make sure that every component is checked in the installer’s “select components” page and enter a super user password on the “Password” page. Maintain the same settings for everything else.
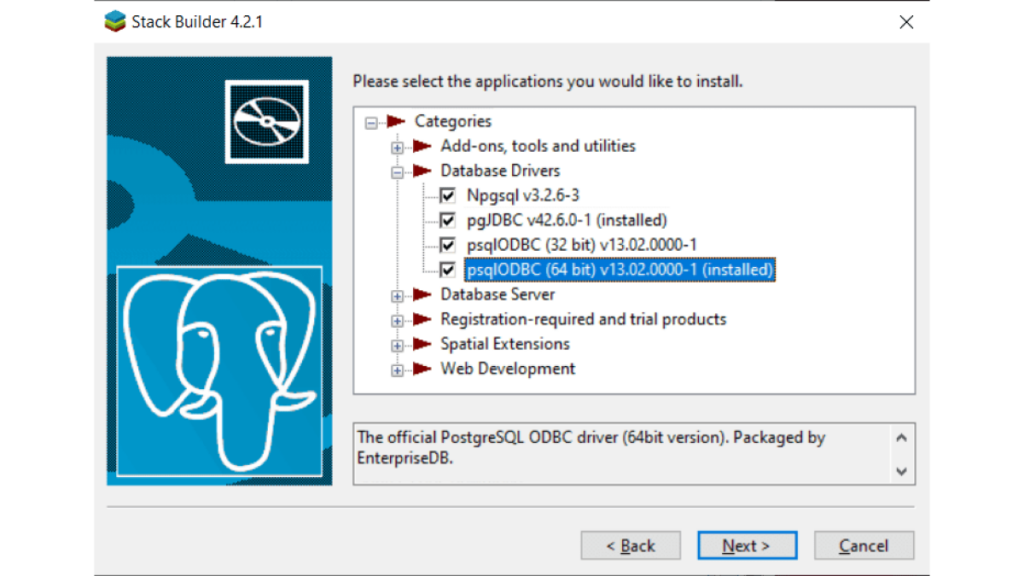
A Stack Builder wizard will appear to assist with installing further PostgreSQL components after PostgreSQL has been installed. After choosing every application in the “Database Drivers” Category, finish the process.
Step 3: Configuring PSQL and pgAdmin4
PgAdmin is already installed on your computer because we chose to install it while installing PostgreSQL on the installer’s choose components page. When it opens, select “Servers” from the Object Explorer tab on the left. Next, in order to access secure pgAdmin, you must enter a password. When you expand the Postgres Object under Servers, the “Login/Group Roles” option will appear. Use the right-click menu to add a new role.
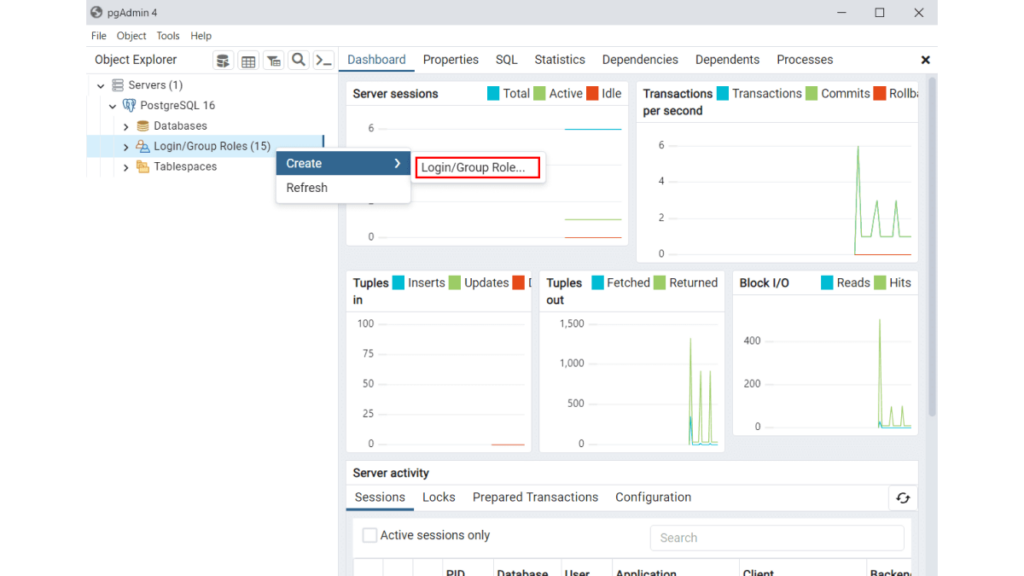
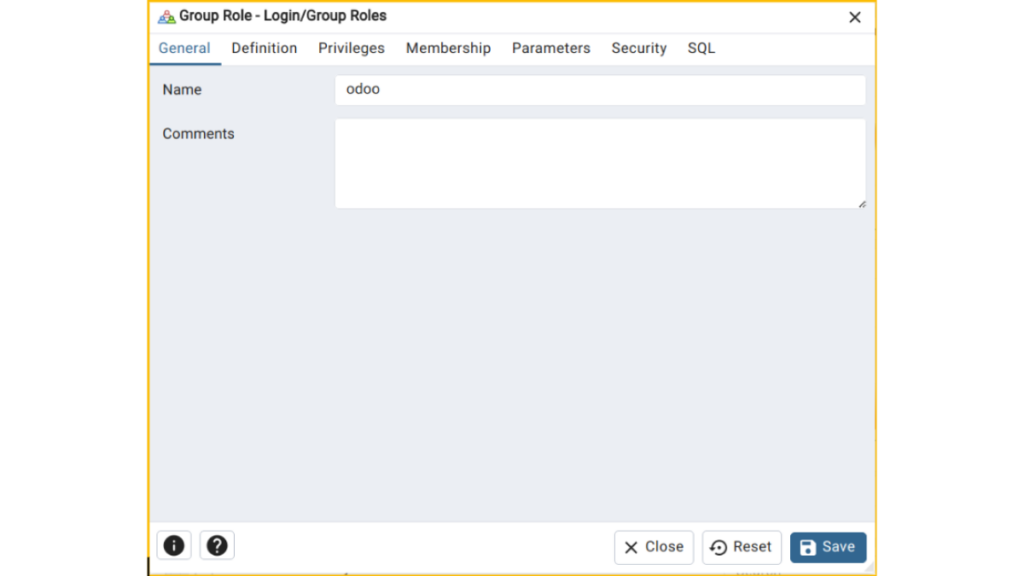
Provide the role name that appears on the “general” tab.
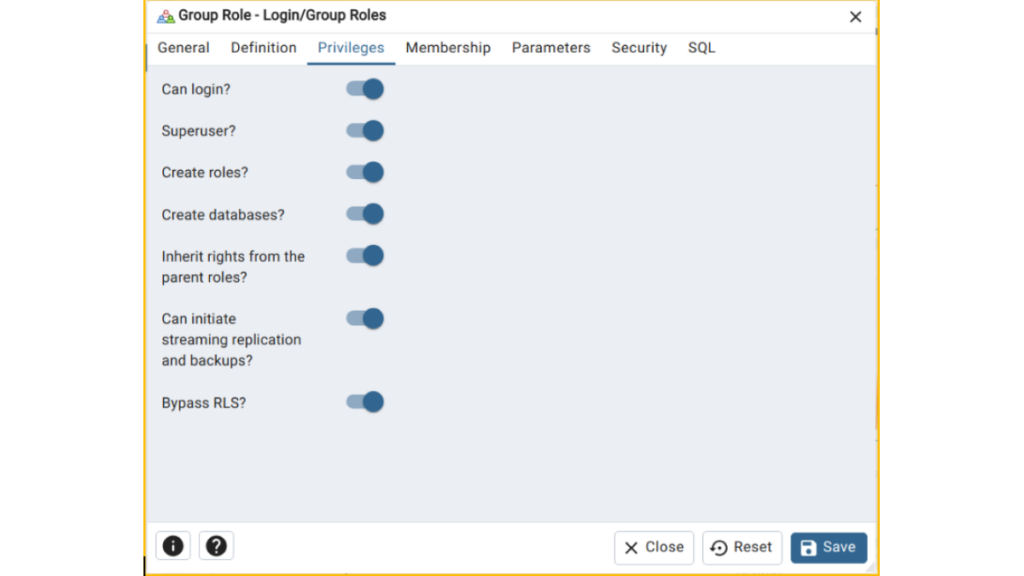
Enable all options from the “Privileges” tab.
Step 4: Use Visual Studio Tools to install the C++ kit.
The building block language for creating Windows applications is C++. A vast array of tools and libraries are available in Visual Studio to facilitate the creation of Windows desktop apps, services, and componentry in C++ by developers.
From the official website, download the C++ Built Tools installer directly (https://visualstudio.microsoft.com/visual-cpp-build-tools/).

Choose the optional components as indicated in the picture and tick “Desktop Development with C++” during the installer’s installation.
After finishing the installation, restart your computer to apply the modifications.
Step 5: Getting Odoo 17 from Github
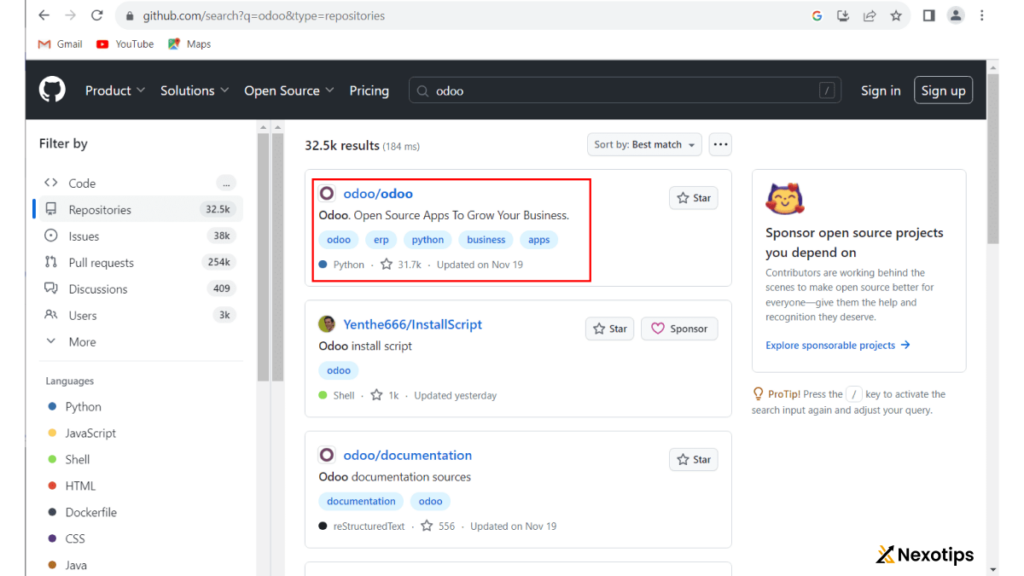
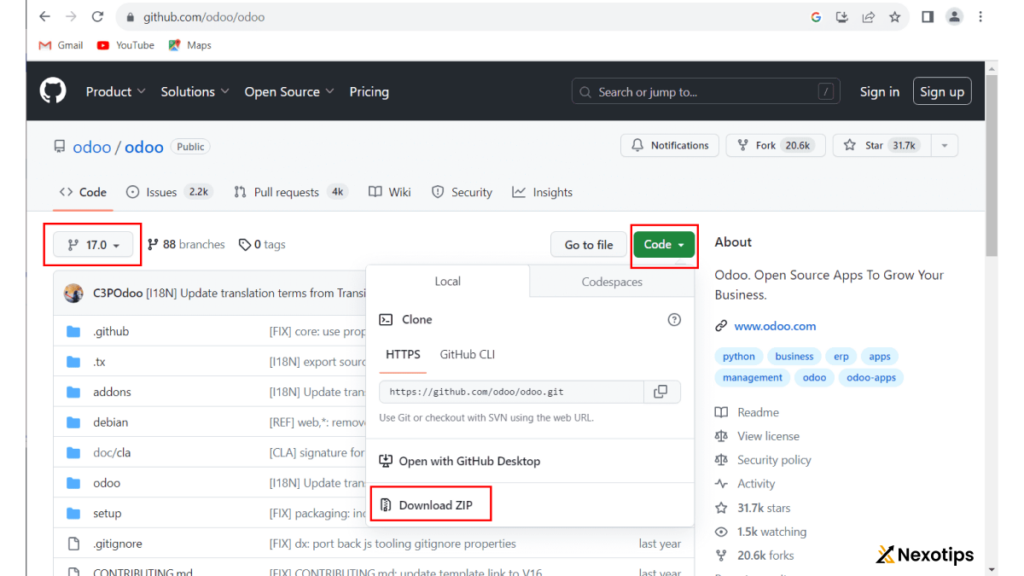
It’s simple to get Odoo 17 from Github. Visit the official GitHub website at [https://github.com/] to do that. Next, run a search for Odoo and select the first result that shows up, as seen in the picture below.
Then confirm the branch shown is 17, and click the “Code” button. Then, you can see the download zip option for Odoo 17.
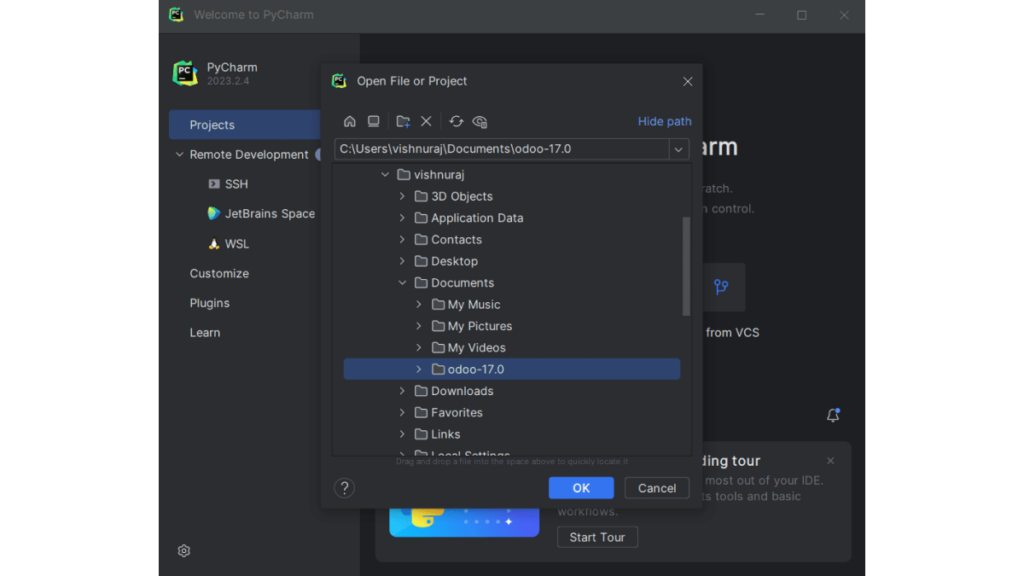
Extract it and keep it in a safe location (better to keep it in the home directory).
Step 6: Pycharm Installation
Requirements for the pycharm installation:
Requirement Minimum
—————— ————
RAM 4 GB of free RAM
CPU Any modern CPU
Disk space 3.5 GB
Monitor resolution 1024×768
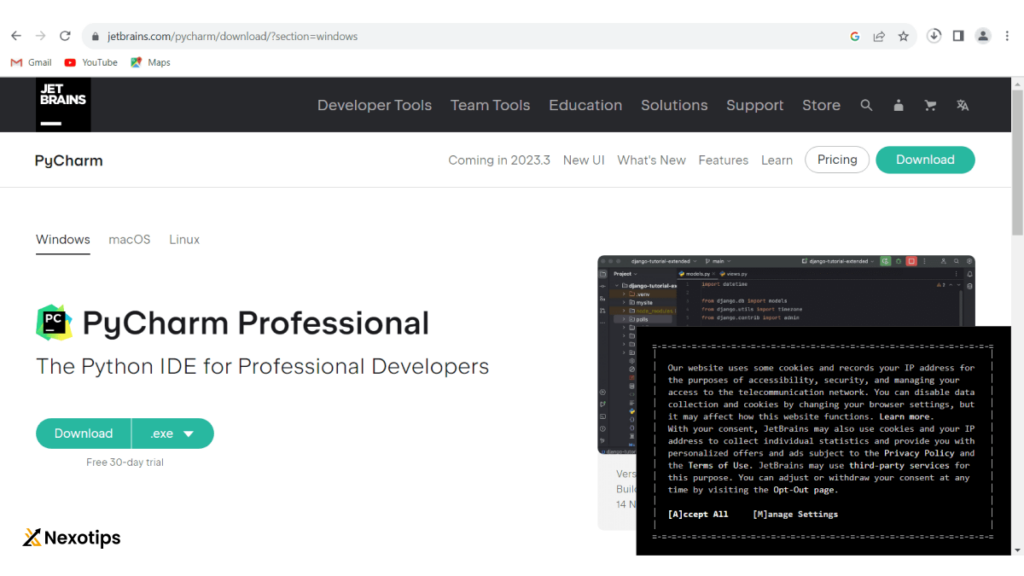
If your system meets these requirements you can download pycharm community from the official jetbrains website – [https://www.jetbrains.com/pycharm/download/?section=windows]
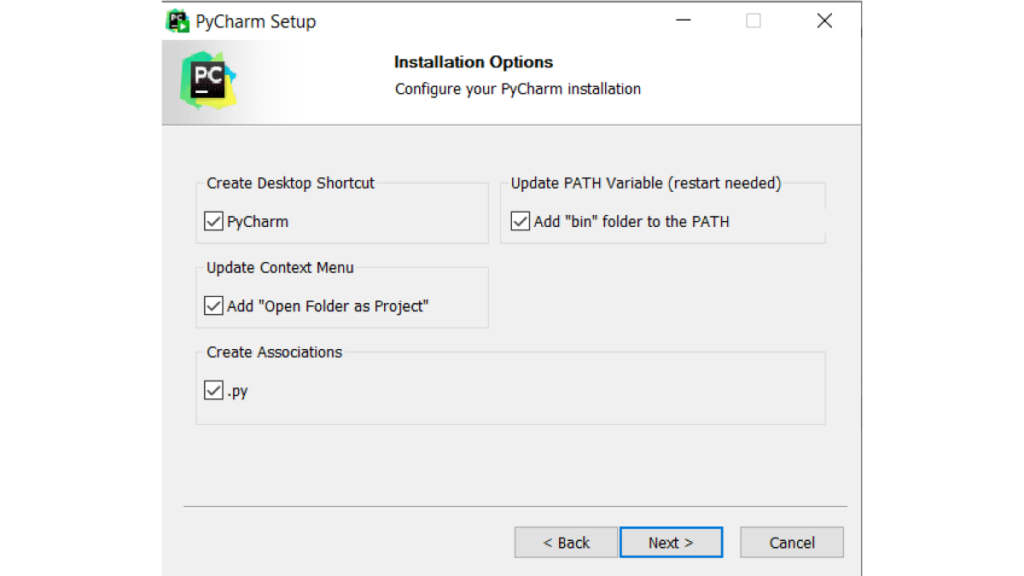
Select installation options while installing the pycharm like in the figure.
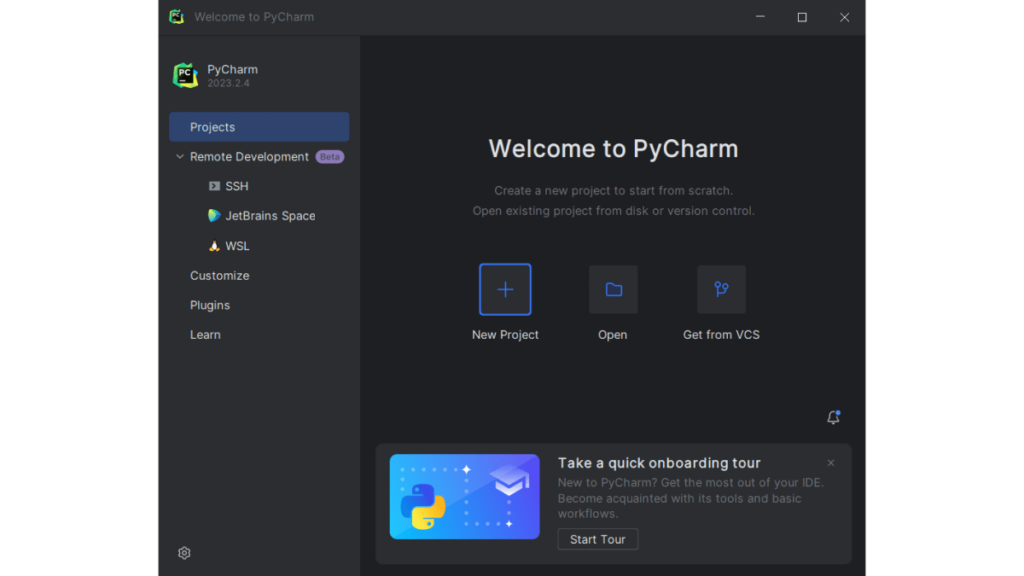
Complete the installation.
Step 7: Setting up the Pycharm Odoo17 Development Environment
This brings us to the last stage of the Odoo17 configuration: environment setup.
To accomplish this, launch PyCharm from Applications and select “Open existing project.”
Choose the extracted Odoo17 folder and click ok.
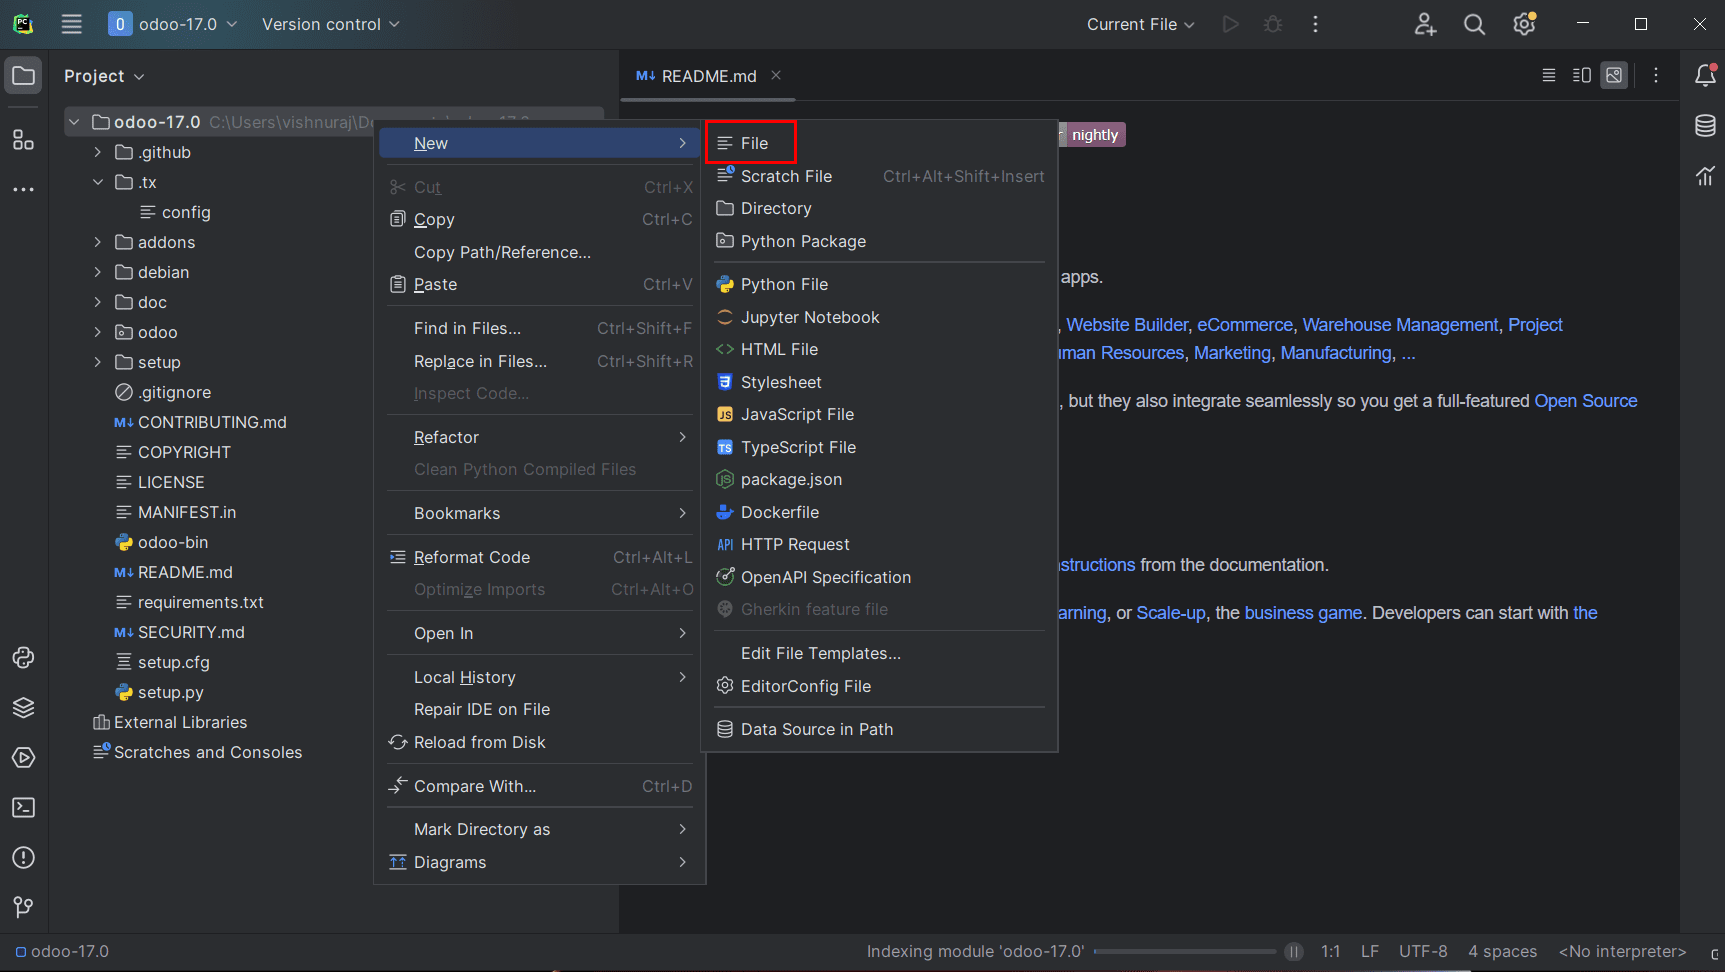
Create an odoo.conf file inside the directory by right clicking on the Odoo-17 folder from project tab (left side).
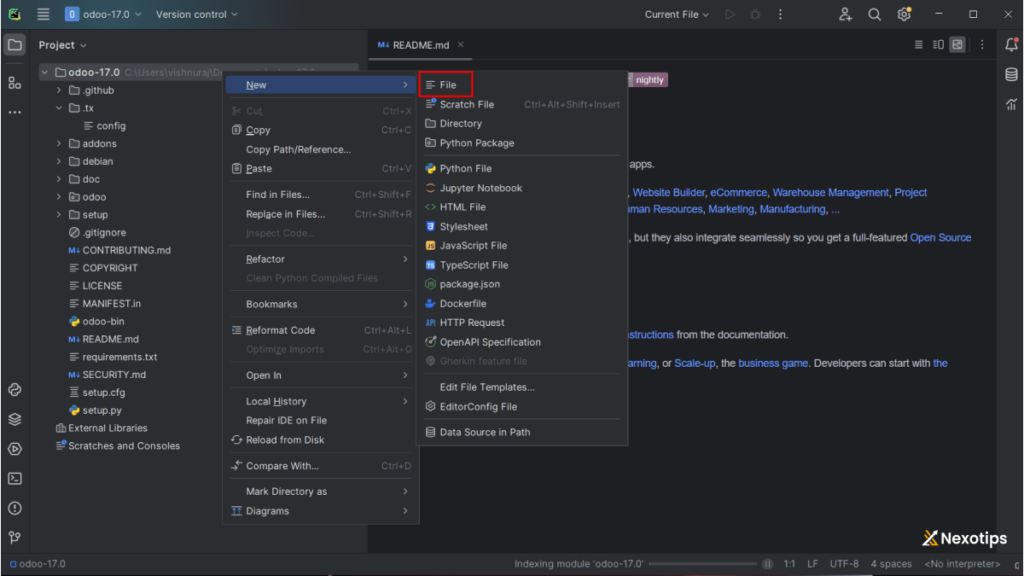
Paste these codes inside it.
[options]
; Is This The Password That Allows Database Operations:
admin_passwd = admin
db_host = localhost
db_port = 5432
db_user = odoo
db_password = odoo
addons_path = /home/user/odoo/addons
xmlrpc_port = 8017
Change the db_user and db_password which is set when configured PostgreSQL using pgAdmin. Also, change addons path to “addons” directory inside the extracted odoo-17.0 folder.

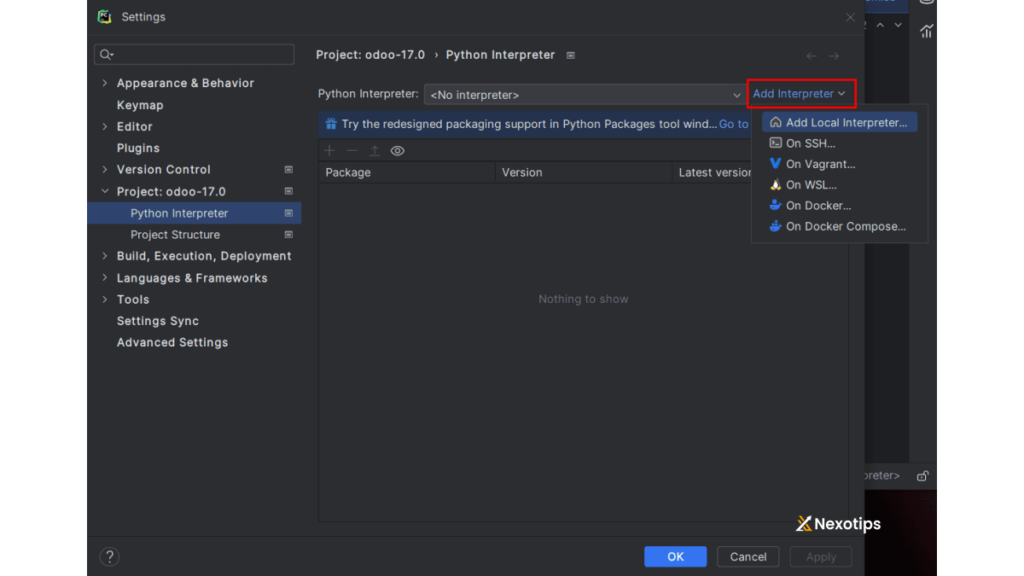
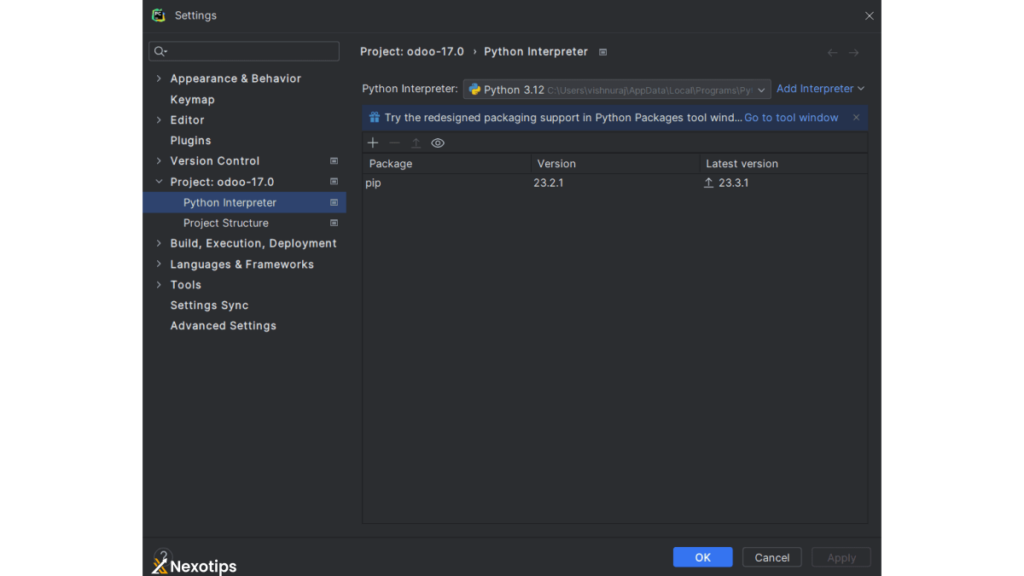
Next, we need to set up a Python Interpreter. For that, go to Settings -> Project Settings -> python Interpreter.
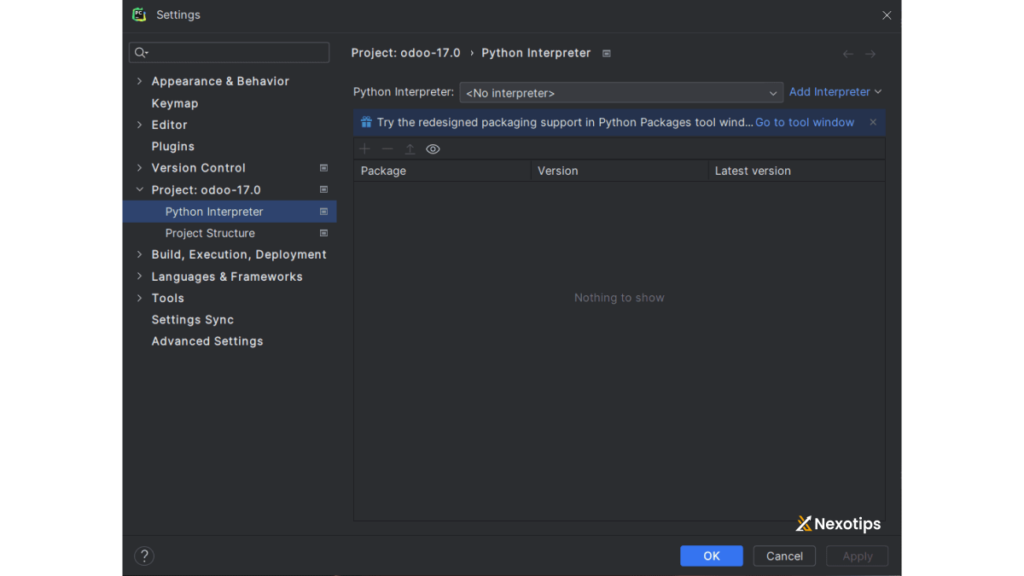
Click on “Add Interpreter” from the Python interpreter option.
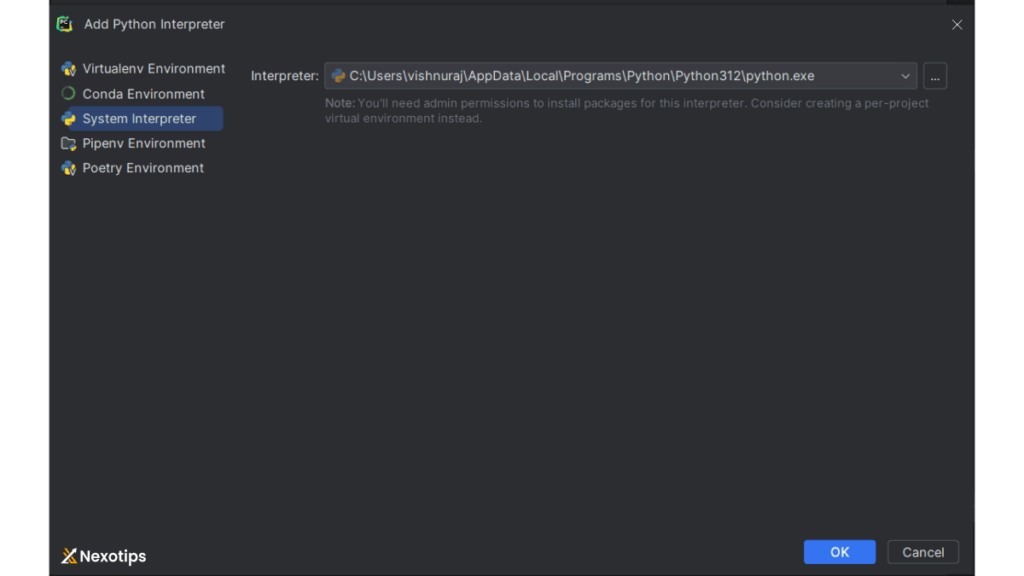
Now, choose the Interpreter as “System Interpreter” as shown in the figure then click OK.
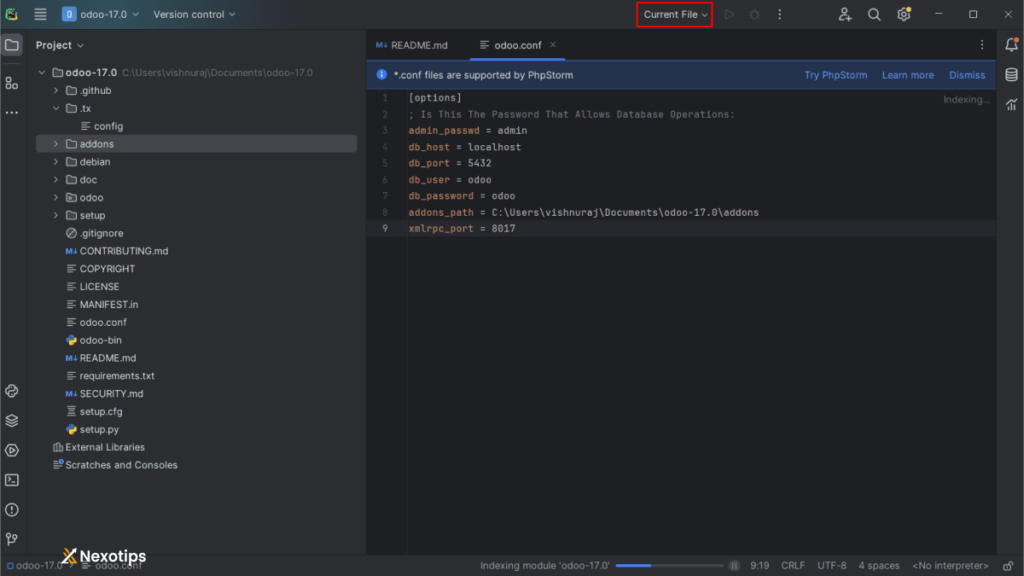
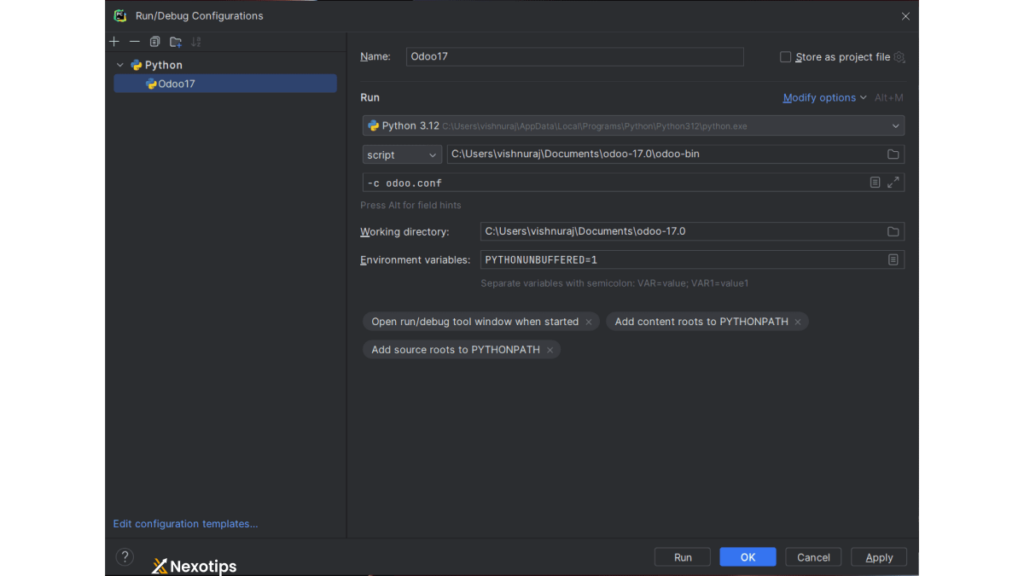
Finally, we need to create a configuration for running the Odoo17 instance. For that, under the “Current file” option select “Edit Configuration.”
Add a new configuration using the Plus icon from the top left panel and choose Python from the options.
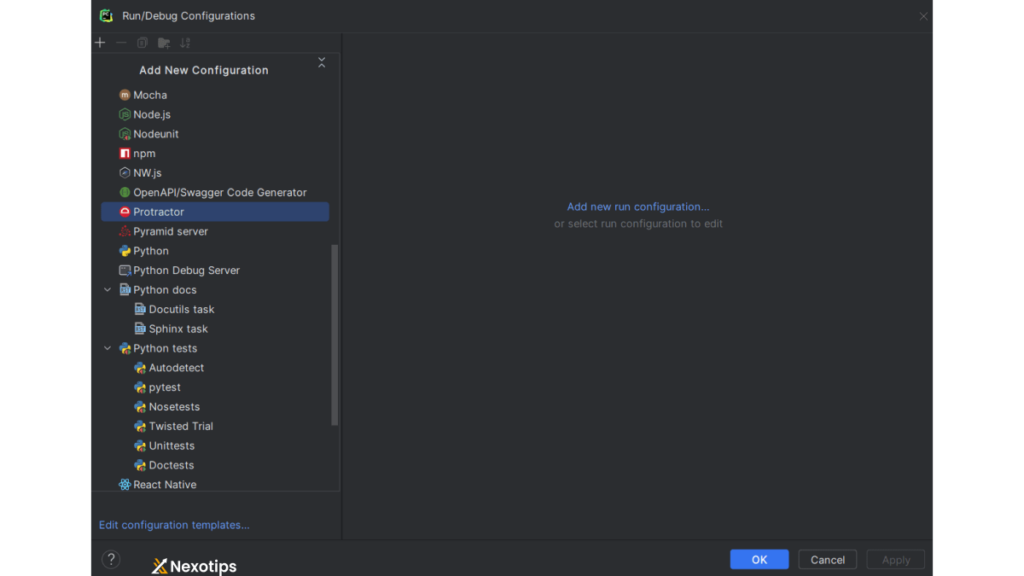
Complete the configuration form as indicated by the illustration.
- Give the configuration a name.
- From the extracted Odoo-17 file, choose “Script path” as “odoo-bin” (Project Directory)
- Only set the Python interpreter if it isn’t already visible.
- Directory of Work choose the project folder that has been extracted.
- Settings: -c odoo.conf
then choose OK and Apply.
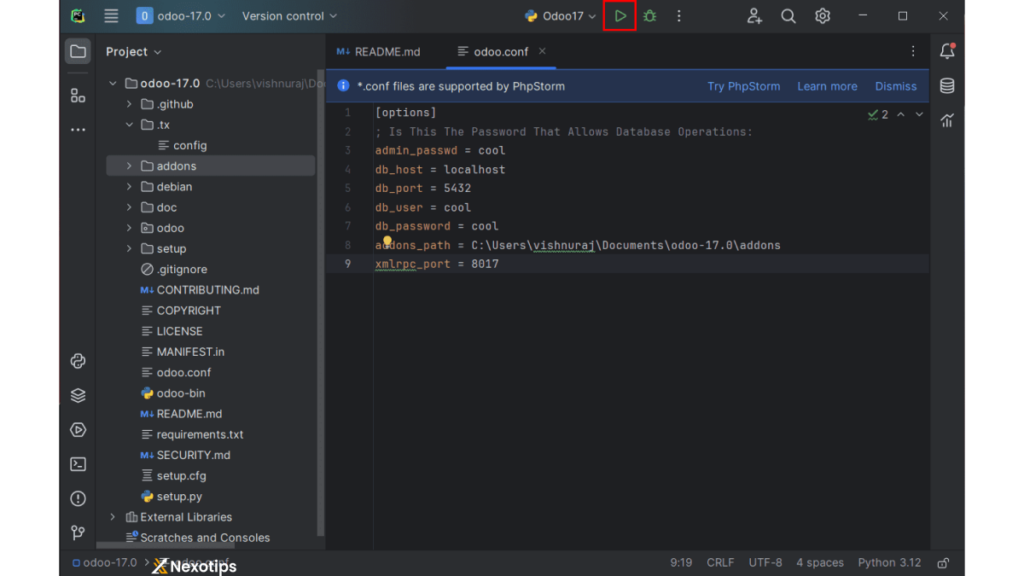
Yeah, Now we can run our Odoo instance by clicking the play icon next to the configuration option or by Keyboard Shift+F10.
Your Python interpreter may not have all of the necessary Python packages installed; in that case, pycharm will display the missing packages. By hand inserting it, we may include it into the Python interpreter.
Navigate to Interpreter Settings and click the plus symbol above the packages to manually add a package. Install the proper package by pasting the name of the missing one into the search field.
Some packages need to be installed with alternate packages which are;
Missing package Alternate package for install
* psycopg2 psycopg2-binary
* PIL PIL-Tools
* dateutil dateutils
* Win32service pypiwin32
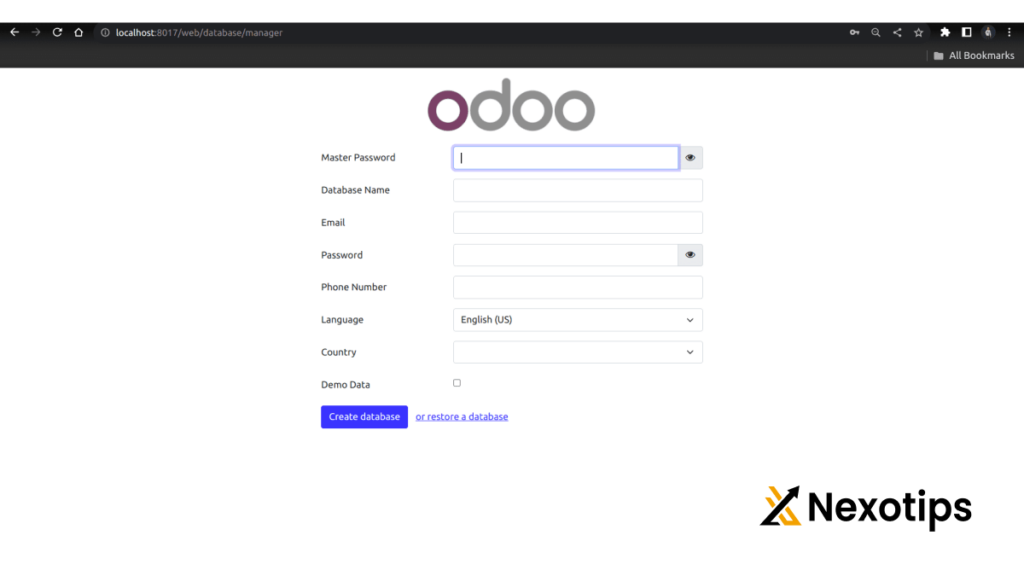
After adding the missing packages, run the instance once again open the browser and paste the “localhost:8017” address.
Nexotips : Your Trusted Partner for Odoo Development
At Nexotips, we pride ourselves on delivering top-notch web development solutions with a commitment to quality and client satisfaction. With over five years of experience in the industry, our skilled team of developers is well-equipped to handle your needs, including the installation and customization of Odoo 17 on Windows. Whether you require a standard setup or a tailored solution to meet your unique business requirements, you can trust us to provide reliable and efficient services. Let Nexotips help you harness the full potential of Odoo to streamline your operations and drive your business forward.
our experienced developers team make it according to client recruitment :
At Nexotips, our experienced developer team excels in tailoring solutions to meet each client’s specific requirements. With over five years of expertise, our developers are adept at understanding your unique business needs and translating them into effective, customized Odoo 17 setups on Windows. Whether you need specialized modules, unique functionalities, or seamless integrations, our team is dedicated to delivering precisely what you need. Trust Nexotips to provide personalized, high-quality solutions that align perfectly with your business goals.